![]() Mon Jul 05, 2004 8:14 am
Mon Jul 05, 2004 8:14 am
**Tutorial** - Analyzing bars/room
This is an imcomplete tutorial. I'm so busy at the moment and I can't continue. It would be a waste to throw these data away and not to share what I know to others so here it goes. Beside, I'm stuck with the camera positions. This tutorial does not show how to import a new 3D mesh of a room. If I disappear for a long time, please continue my work. Thanks.
Sooner or later we'll make new bars or rooms and it would be nice if they're different from the rest.
For adventure mod, you might want to add an extra room such as restaurant (see Kusari bars) , hotel lounge (see Houston commodity room) , hospital, etc...
So let's analyze all the hardpoints, props, table, NPC and see what happens.
________________________________________________________________________________________________
- Utility, Tools, Tutorials, References:
- NotePad: to edit text files
- THN Decompiler
- Freelancer Head Accessory Collection to see pictures of helmets, sunglasses, hats, etc...
- Tutorial: "Creating New Hardpoints": learn more about the Position and Orientation
- "Hardpoint Orientation Calculator ": might works
- Tutorial: "Intro scripts ", it'll show you more info about category "Solar" & "Spaceship" + camera path
- Freelancer SDK: in case you mess up and want to restore some files.
- Freelancer base pictures with archetype: pictures of bases.
- More Freelancer base pictures: more info.
- ***Info*** All Bases and Systems NickName = RealName: what's Li01_01?
- Faction code: what's li_p_grp?
________________________________________________________________________________________________
Tutorial:
- Consists of 8 parts:
- Part I: the Header
- Part II: Lighting
- Part III: Room View
- Part IV: Tables
- Part V: Props
- Part VI: NPC
- Part VII: Events
- Part VIII: Download templates
________________________________________________________________________________________________
- Pictures of New York bars
- Manhattan, Pittsburgh, Missouri, Trenton, Norfolk, Newark, West Pt., Detroit Munition, Ft. Bush, Buffalo, Rochester, Baltimore
- Pictures of Texas bars
- Houston, LPI Huntsville, Mississippi, Beaumont Base, LPI Sugarland, Osiris
- some bars are similar so I'll reuse the same pictures.
Edited by - buckaroobanzai on 3/28/2006 6:23:18 AM


 li_table_round,
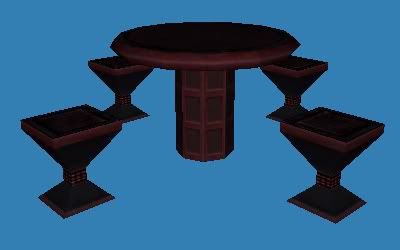


 ashtray_1,
  ashtray_3
 bottle_1,
  bottle_2,
  bottle_3
 bottle_wine_1,
  bottle_wine_2,
  bottle_wine_3,
  beerbottle
 glass_blue,
  glass_metal_1 or mug_1,
  glass_wine_1,
 glass_1,
  glass_2,
  glass_green or tumbler
 barcloth_wadded,
  barcloth_flat


 download this utility: